That Orange Gunk Is Killing Your Chain (Here’s How to Fix It)
Remove surface rust by spraying the chain with WD-40 or a dedicated rust remover, letting it sit for 10 minutes, then scrubbing vigorously with a stiff brass brush or steel wool while rotating the pedals backward. For moderate rust, soak the chain in white vinegar or citric acid solution for 2-3 hours, agitate with a brush, then rinse thoroughly and re-lubricate immediately. Deep rust penetration requires chain removal and overnight soaking in a rust dissolver like Evapo-Rust, followed by detailed inspection of link flexibility and roller movement.
Assess whether cleaning is worthwhile by checking for stiff links, pitting deeper than surface level, or visible metal deterioration between rollers. A chain showing any of these signs after cleaning should be replaced rather than returned to service, as structural integrity is compromised. Understanding chain maintenance basics helps prevent rust formation through regular cleaning every 100-200 miles and proper lubrication after wet rides.
Prevention beats restoration every time. Store your bike in dry conditions, apply chain lube that includes corrosion inhibitors, and wipe down the drivetrain after rainy rides. Catching rust early transforms a 10-minute fix into avoiding a complete drivetrain replacement costing significantly more in parts and labor.
Why Your Chain Rusts (And Why It Matters)
Rust forms on your bike chain through a straightforward chemical process called oxidation. When iron in the steel chain meets moisture and oxygen, it creates iron oxide—that familiar reddish-brown coating we call rust. While this might seem like basic chemistry, understanding what’s happening helps you prevent and address the problem effectively.
Your chain faces moisture from multiple sources: riding in rain, washing your bike, humid storage environments, or even overnight dew in a garage. Salt from winter roads or coastal air accelerates the process dramatically. Many cyclists discover rust after storing their bike for just a few weeks in a damp basement or leaving it outside under a cover. Even sweat dripping onto your chain during indoor trainer sessions can trigger corrosion if left uncleaned.
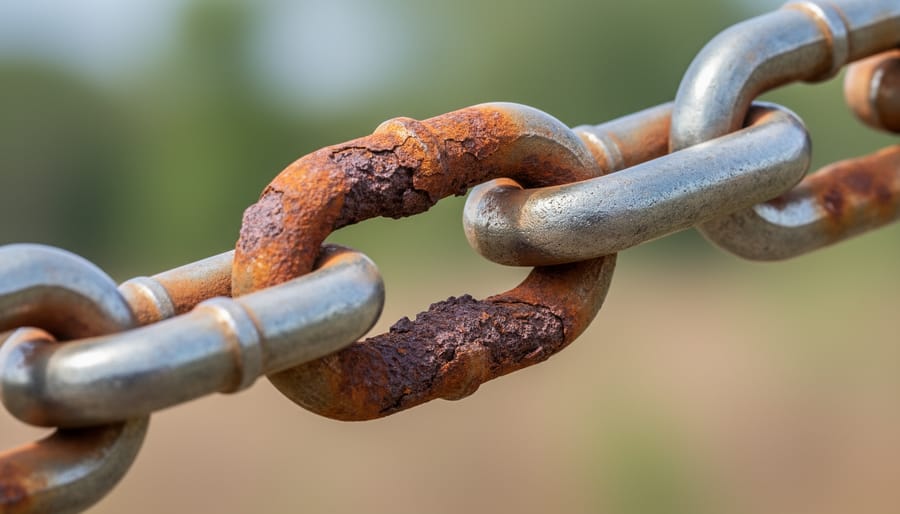
Here’s what matters for your riding: surface rust affects performance differently than deep corrosion. Light surface rust—that orangish film you can feel with your finger—creates friction that makes shifting sluggish and pedaling less efficient. You’ll notice the chain feels gritty or stiff when moving it by hand. This level is usually reversible with proper cleaning.
Deep rust is the serious concern. When oxidation penetrates between the pins and rollers, it causes permanent damage. The chain loses flexibility, creating stiff links that skip gears and accelerate wear on your cassette and chainrings. A severely rusted chain can snap unexpectedly, leaving you stranded or causing a dangerous fall.
The good news? Most rust cyclists encounter is surface-level and completely salvageable. If you’ve caught it early—meaning the chain still moves smoothly and rust wipes away partially with a rag—you’re in excellent shape for a successful cleaning. Understanding this distinction helps you make smart decisions about whether to grab your cleaning supplies or head to the bike shop for a replacement.
What You’ll Need to Clean a Rusty Chain
Essential Cleaning Supplies
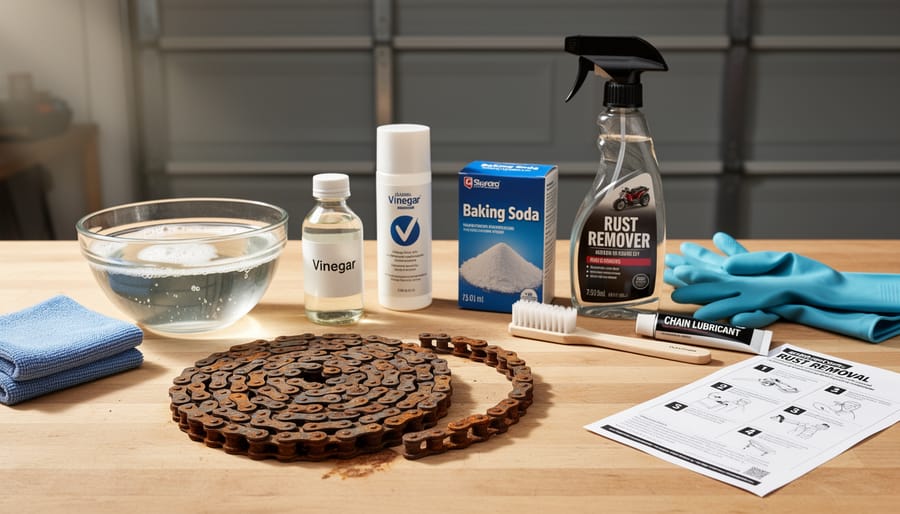
Before tackling that rusty chain, gather these essential tools to make the job effective and protect your drivetrain investment. A quality bike-specific degreaser breaks down built-up grime and penetrates rust, loosening corrosion that basic soap can’t touch. You’ll need a stiff-bristled brush, ideally a dedicated chain scrubber or old toothbrush, to work into each link and remove stubborn deposits without damaging metal surfaces. Clean, lint-free rags are crucial for wiping away dissolved rust and excess cleaning solution between treatment stages. Finally, fresh chain lubricant is non-negotiable since cleaning strips away all protective oils, and applying lube immediately after drying prevents new rust formation. If you’re dealing with moderate to severe rust, consider adding fine steel wool or a rust remover solution to your arsenal. Having everything ready before you start means you won’t leave your chain exposed and vulnerable mid-process, which is a common mistake that actually accelerates corrosion.
Rust-Specific Solutions
When tackling chain rust, you have several effective options at your disposal. For light surface rust, white vinegar works remarkably well as a budget-friendly solution—simply soak the chain for 15-30 minutes, then scrub with a stiff brush. The acetic acid breaks down rust without requiring specialized equipment.
Citric acid powder offers another DIY approach that’s gentler on metal than vinegar. Mix two tablespoons per cup of warm water and let your chain soak for an hour. This method is particularly popular in our cycling community because it’s eco-friendly and won’t damage aluminum components if accidentally splashed.
For stubborn rust, commercial rust removers like Evapo-Rust or WD-40’s Specialist Rust Remover Soak provide faster results. These products use chelating agents that dissolve rust chemically without the scrubbing intensity DIY methods require. While pricier, they’re time-savers for heavily corroded chains.
A pro tip from experienced mechanics: whatever solution you choose, thoroughly rinse and dry your chain immediately after treatment, then apply fresh lubricant within the hour to prevent flash rusting. This crucial step protects the newly exposed metal from oxidizing again.
Step-by-Step: Cleaning Surface Rust
Initial Inspection and Prep
Before diving into the cleaning process, take a moment to evaluate what you’re working with. Inspect your chain closely under good lighting—surface rust appears as light orange discoloration and wipes away easily, while deep rust shows dark brown or black pitting that feels rough to the touch. Run your fingers along the chain to check for stiffness in the links, as this indicates corrosion has penetrated deeper.
Set up your workspace in a well-ventilated area, preferably outdoors or in a garage. Lay down newspaper or an old towel to catch drips and debris. You’ll want your bike in a stable position—a repair stand works perfectly, but flipping it upside down or leaning it against a wall also does the job. Shift to the smallest chainring and smallest rear cog to create slack in the chain, making it easier to handle. If you’re part of our cycling community, share a photo of your rusty chain situation—fellow riders often offer valuable insights on whether cleaning or replacement is your best path forward.
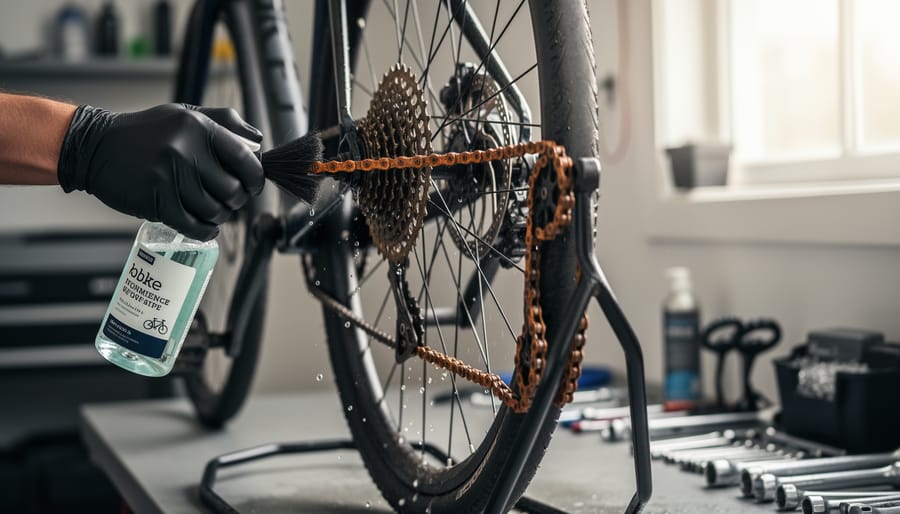
The Cleaning Process
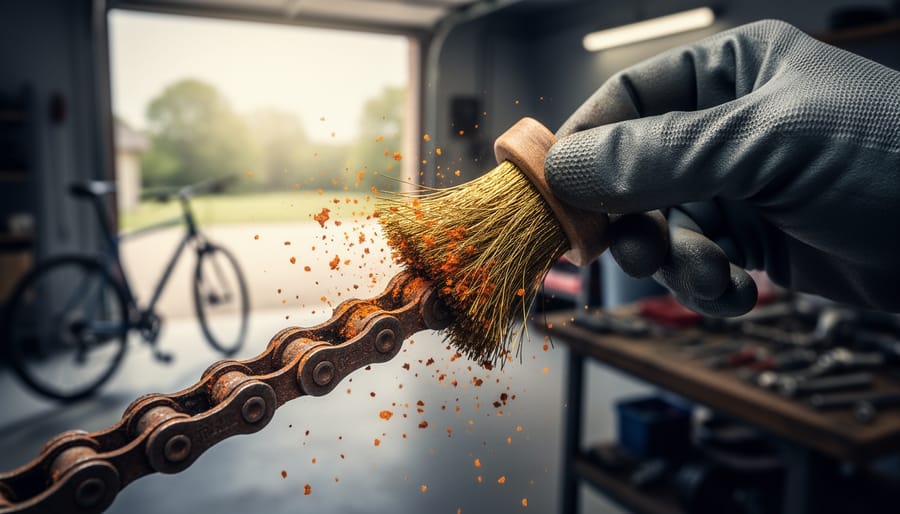
Now comes the hands-on part. Start by applying a quality degreaser directly onto the chain while it’s still on the bike. Work the degreaser into each link by slowly backpedaling the cranks, allowing the solution to penetrate for 3-5 minutes. This dwell time is crucial for breaking down grime that’s protecting the rust underneath.
Next, grab a stiff-bristled brush or an old toothbrush and begin scrubbing each section of the chain. Use short, circular motions on the outer plates, then switch to back-and-forth movements between the rollers where rust loves to hide. Pay special attention to the inner links, as this is where moisture tends to accumulate. Expect to spend 10-15 minutes on this step for a moderately rusted chain.
For stubborn rust spots, apply a specialized rust remover or create a paste using baking soda and water. Let it sit for 2-3 minutes before scrubbing again. You’ll notice the rust beginning to lift as an orange-brown residue. Keep a clean rag nearby to wipe away loosened debris as you work.
Rinse the chain thoroughly with clean water, ensuring all chemical residue is removed. If you removed the chain earlier, agitate it in a container of clean water. For chains still mounted, use a spray bottle or gentle stream from a hose.
Finally, dry the chain completely using clean rags, working through each link methodically. Any remaining moisture will invite rust right back, so take your time with this step.
Drying and Re-Lubrication
Once your chain is completely clean, timing becomes critical. Water is rust’s best friend, so you need to dry the chain thoroughly within minutes. Use clean, lint-free rags to wipe down each link, then spin the pedals backward while holding a dry cloth against the chain to remove moisture from inner rollers. For stubborn water droplets, a low-pressure air compressor or even a hair dryer on cool setting works wonders.
Here’s the part many riders miss: a bare metal chain will start surface-rusting surprisingly fast, sometimes within hours. Immediately after drying, apply your chosen chain lubricant. For proper chain lubrication, apply one drop per roller while rotating the pedals backward, then let it penetrate for 5-10 minutes before wiping off excess. This creates a protective barrier against moisture and oxygen.
Pro tip from the shop: if you’ve just removed heavy rust, consider applying lube twice in the first 24 hours for extra protection while any microscopic pitting fills in.
Deep Clean Method: When Rust Won’t Budge
When surface cleaning just isn’t cutting it and your chain is seriously caked with rust, it’s time to bring out the heavy artillery. This deep clean method requires more effort and time, but it can save a chain that looks beyond hope.
The first step involves removing your chain from your bike. If you have a chain with a quick link, this is straightforward with the right tool. For chains without quick links, you’ll need a chain breaker tool. Once removed, inspect the chain closely. If the rust has eaten through the metal creating pitting, or if the links are completely seized, replacement is your best option. However, if the rust is primarily surface-level, even if heavy, this method can work wonders.
For the soaking solution, you have several effective options. White vinegar is the community favorite due to its availability and safety. Place your chain in a plastic container and cover it completely with vinegar. Let it soak for 2-4 hours, checking periodically. The acidic properties break down rust surprisingly well. For tougher cases, try a 50/50 mix of vinegar and lemon juice.
Another excellent option is a commercial degreaser mixed with a rust remover like CLR or Evapo-Rust. These products work faster, often requiring just 30-60 minutes of soaking, but follow the manufacturer’s instructions carefully.
During soaking, agitate the chain every 30 minutes by swishing it around or stirring with a stick. After soaking, use a stiff brush or an old toothbrush to scrub each link thoroughly. For stubborn spots, a brass wire brush works excellently without damaging the metal. Rinse the chain completely with clean water, then immediately dry it with clean rags to prevent flash rusting.
Here’s the real talk: this method is worth it for mid-range to high-end chains where replacement costs 30 dollars or more. For basic chains under 15 dollars, your time might be better spent on a replacement. After cleaning, the chain requires immediate lubrication. Apply chain-specific lubricant to every link, wipe off excess, and you’re ready to reinstall.
This deep clean can extend your chain’s life by months, making it a valuable skill in any cyclist’s maintenance arsenal.
Is Your Chain Too Far Gone? The Replacement Test
Before investing time in cleaning that rusty chain, let’s determine if it’s actually salvageable. Even the most thorough cleaning won’t help a chain that’s structurally compromised.
Start with the ruler test, a simple method cycling mechanics use worldwide. Place a 12-inch ruler alongside your chain while it’s on the chainring. Align the zero mark with a rivet pin, then check the 12-inch mark. If it aligns beyond the 12th rivet pin (typically more than 1/16 inch), your chain has stretched beyond serviceable limits. Surface rust combined with significant wear means replacement is your only option.
Next, examine individual links for frozen or stiff movement. Lift the chain off your bike and flex it side to side and lengthwise. Every link should move freely. If rust has seized links and they won’t budge after applying penetrating oil for 10 minutes, the internal damage is too severe for cleaning to resolve.
Check for visible cracks, deep pitting, or flaking metal where rust has eaten through the outer plates. Run your fingers along the chain’s length, feeling for rough edges or compromised metal. If rust has created structural weakness rather than just surface discoloration, cleaning becomes a safety risk.
The good news? Replacement chains range from 15 to 60 dollars depending on your drivetrain speed. Quality chains from reputable manufacturers last 2,000 to 3,000 miles with proper maintenance. Considering the cost of replacing worn cassettes and chainrings due to a stretched chain, timely replacement saves money long-term. When in doubt, remember that your community bike shop can perform a quick chain wear assessment, often free of charge.
Keeping Rust Away for Good
Post-Ride Care That Takes 2 Minutes
The best rust prevention happens in those crucial minutes after each ride, especially when you’ve been caught in the rain. Here’s your quick routine: wipe down your chain with a clean, dry rag to remove surface moisture and road grime. This simple action prevents water from sitting on metal surfaces where rust loves to form. If you’ve been riding in wet conditions, take an extra 30 seconds to apply a light coating of chain lubricant—this creates a protective barrier that displaces any remaining moisture. Think of it as giving your chain a raincoat before storing your bike. For riders in humid climates or coastal areas, consider keeping a dedicated “post-ride rag” near your bike storage area as a visual reminder. Many cyclists in our community swear by this two-minute habit, reporting dramatically longer chain life and virtually no rust issues. The key is consistency—making this part of your routine prevents the frustrating discovery of orange spots weeks later when you’re eager to ride.
Storage Solutions
Where you store your bike plays a crucial role in preventing chain rust before it starts. Indoor storage remains your best defense—keeping bikes inside apartments or homes shields chains from humidity and temperature fluctuations that accelerate corrosion. If you’re working with limited space, wall-mounted hooks or vertical stands work brilliantly while maintaining that protective indoor environment.
For garage storage, choose the driest area possible, ideally away from water heaters or washing machines that increase moisture levels. Hanging bikes rather than leaning them against damp walls makes a significant difference. Consider using a dehumidifier in particularly humid climates—it’s an investment that protects your entire bike, not just the chain.
Outdoor storage should be your last resort, but if unavoidable, invest in a quality weatherproof cover that fully encapsulates your bike. Before covering, apply a light coating of chain lubricant to create a protective barrier. Following proper bike storage practices will dramatically extend the time between rust cleaning sessions and keep your chain running smoothly for years to come.
Keeping your bike chain rust-free doesn’t have to be complicated. With the right techniques and a bit of regular attention, you can extend your chain’s lifespan and enjoy smoother, safer rides. Whether you’ve successfully revived a rusty chain or opted for a replacement, remember that consistent maintenance is your best defense against future corrosion.
We’d love to hear from you! What rust-fighting methods have worked best in your experience? Do you have any expert tips or creative solutions to share? Head over to our community forums and join the conversation with fellow cyclists who are passionate about keeping their rides in top condition.
Chain maintenance might seem like a small detail, but it’s these simple acts of care that make all the difference in your cycling experience. A well-maintained chain means better performance, increased safety, and more enjoyable miles on the road or trail. Keep pedaling, keep caring for your bike, and ride on!