How to Repair Bike Tires and Tubes: Step-by-Step Guidelines for Every Cyclist
Repairing a tire safely comes down to one critical decision: understanding whether the damage falls within repairable limits or requires replacement. Most punctures smaller than 6mm in the tread area can be fixed reliably with patches or plugs, but sidewall damage, large tears, or cuts near the bead almost always mean it’s time for a new tire. The process itself takes 15 to 30 minutes for tube repairs and slightly longer for tubeless setups, requiring only basic tools like tire levers, a pump, and a quality patch kit or plug system.
Getting this right matters because a poorly executed repair can fail mid-ride, leaving you stranded or worse. Even experienced cyclists sometimes skip verification steps or attempt to save tires that are beyond safe repair thresholds. The good news? Once you understand the evaluation criteria and follow proven techniques, tire repair becomes one of those essential skills that saves money and keeps you riding when others might be calling for a pickup.
This guide walks you through the complete repair process for both traditional tube systems and modern tubeless setups. You’ll learn exactly how to assess damage, gather the right materials, execute repairs with confidence, and verify your work before heading back out. We’ve included expert tips gathered from mechanics and seasoned riders who’ve debugged every common mistake, plus clear warnings about when DIY repairs cross into unsafe territory. Whether you’re fixing a simple thorn puncture or tackling your first tubeless plug, you’ll have the knowledge to do it properly.
When to Repair vs. Replace: Safety Evaluation Guidelines
Knowing when to repair versus replace a tire or tube is crucial for cycling safety and can prevent dangerous blowouts mid-ride. Not all punctures and damage are created equal, and attempting to repair damage beyond safe limits puts you at serious risk.
For punctures in the tread area of tubes, repairs are generally safe when the hole is smaller than 6mm and located away from the valve stem. Small punctures on the center tread can be patched reliably multiple times. However, damage near the valve stem weakens the tube’s structural integrity, and sidewall punctures in tubes flex too much during riding for patches to hold securely.
Tire casing evaluation requires careful inspection beyond just the obvious puncture. Check for exposed threads, bulges, or cracks in the rubber. Small tread punctures under 3mm can often be plugged or booted temporarily, but any visible casing threads mean the tire’s structural layer is compromised. Sidewall cuts are particularly dangerous because this area flexes constantly and bears enormous stress during cornering.
Wear indicators matter as much as damage assessment. Replace tires when tread wear indicators appear, when the center tread is noticeably flatter than the edges, or when small cracks appear in the rubber compound from age and UV exposure. Even if a worn tire seems patchable, the weakened casing won’t hold repairs reliably.
Tubeless setups offer more repair flexibility than traditional tubes. Small punctures typically self-seal with sealant, and holes up to 6mm can be plugged from the outside while riding. But tubeless tires with sidewall damage, large gashes, or bead separation still require replacement. When tubeless sealant can’t maintain pressure after adding fresh sealant and attempting a plug repair, it’s time for a new tire rather than risking a tube conversion on compromised casing.
Essential Tools and Materials for Tire Repair
A successful tire repair depends on having the right tools within reach, whether you’re fixing a flat at home or dealing with a puncture miles from civilization. The good news is that a basic repair kit requires minimal investment and fits easily into a saddle bag or backpack.
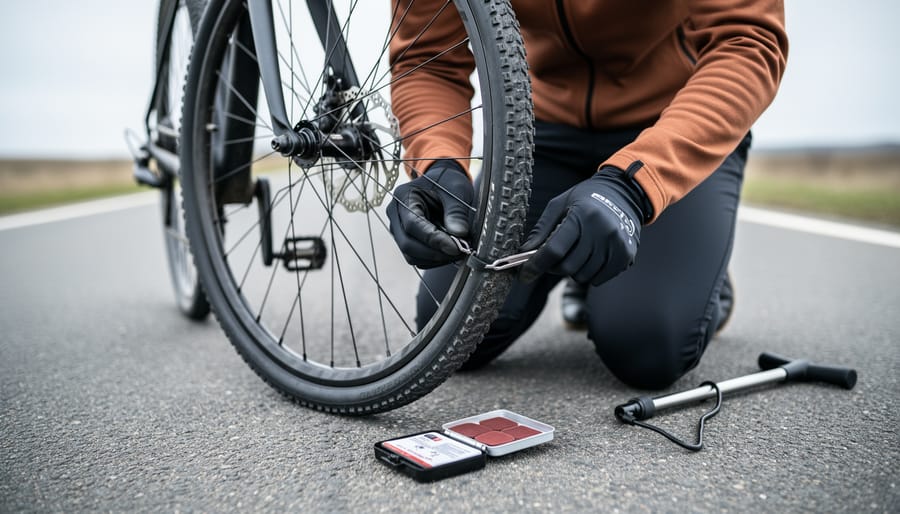
For fundamental tube repairs, you need three core items: tire levers to remove the tire from the rim without damaging either component, a quality patch kit with adhesive and patches sized for bicycle tubes, and a reliable pump or CO2 inflator to reinflate after the repair. Add a small bucket or water bottle for the submersion test when locating punctures, plus a clean rag for wiping down the tube surface before patching.
Your essential toolkit should include:
- Tire levers (set of 2-3, plastic or metal)
- Patch kit with vulcanizing glue and assorted patch sizes
- Portable pump or CO2 inflator with cartridges
- Spare tube (matches your tire size)
- Tire boots or emergency casing patches
- Tubeless plug kit with insertion tool and plugs (for tubeless setups)
- Small piece of sandpaper or abrasive pad (often included in patch kits)
- Valve core remover tool (essential for tubeless repairs)
- Tubeless sealant bottle (for topping up or initial installation)
- Nitrile gloves to keep hands clean when handling sealant
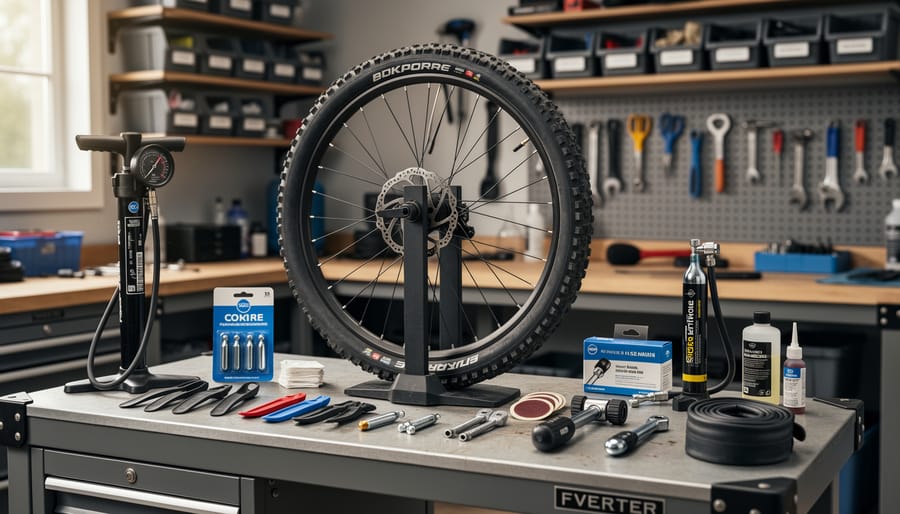
For workshop repairs, consider upgrading to a floor pump with an accurate gauge, vulcanizing solution for more permanent patches, and dedicated tubeless tire sealant injectors. Professional mechanics often keep multiple patch kit types on hand, including glueless self-adhesive patches for quick roadside fixes and traditional vulcanizing patches for maximum durability.
Portable kits should prioritize compact, lightweight options that cover the most common scenarios. A micro pump, two tire levers, a basic patch kit, and one spare tube handle 90% of roadside situations without weighing you down.
Pre-Repair Safety Checks and Preparation
Before touching any damaged tire or tube, take a moment to assess your environment and prepare your workspace properly. Whether you’re fixing a flat at home or on the roadside, these safety checks prevent injuries and ensure your repair actually holds.
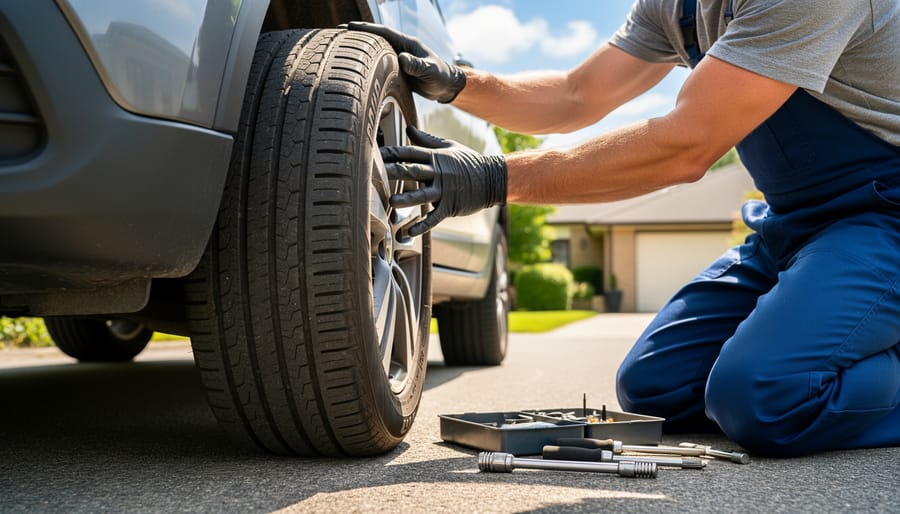
Start by fully deflating the tire, press the valve core to release all remaining air pressure. A tire under even partial pressure can suddenly pop off the rim during removal, potentially causing injury or sending tire levers flying. Once deflated, run your fingers carefully around the inside of the tire casing (wearing gloves helps) to locate any sharp objects still embedded in the rubber. Glass shards, thorns, or metal fragments often remain stuck in place and will puncture your freshly patched tube the moment you reinflate if you miss them.
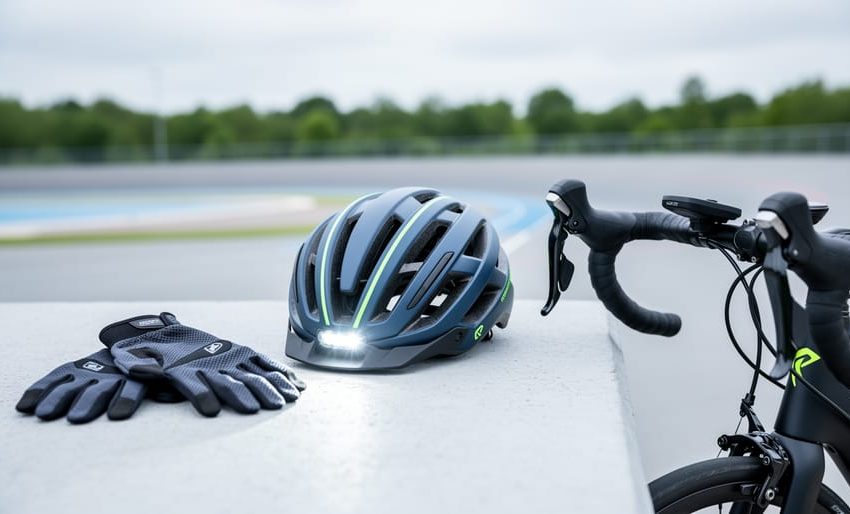
Identify the full extent of damage before committing to a repair. Look for multiple punctures, sidewall cuts, or bulges that might make the tire unsafe to patch. Good lighting matters, use a headlamp or work near a window so you don’t overlook secondary damage. If you’re repairing roadside, review basic roadside safety tips first: move away from traffic, use visibility gear, and stabilize your bike.
Set out all your tools and materials within reach before starting. This prevents mid-repair scrambles and keeps you focused on proper technique rather than hunting for tire levers or patches when your hands are covered in sealant.
Step-by-Step Tube Repair Process
Finding Hidden Punctures
Locating a tiny puncture in an inner tube can feel like searching for a needle in a haystack, especially when the leak is slow. Start by inflating the tube to about twice its normal size, this makes even small holes easier to detect. Hold the tube close to your ear and slowly rotate it, listening for the telltale hiss of escaping air. Work systematically in sections so you don’t miss anything.
If listening doesn’t reveal the leak, use the water submersion method. Fill a bucket or sink with water and submerge sections of the inflated tube one at a time. Watch carefully for streams of tiny bubbles rising from the puncture point. Mark the spot immediately with a pen or crayon before the tube dries, punctures disappear once deflated.
For visual inspection, examine the tube under good lighting while flexing it gently. Look for embedded thorns, glass shards, or the distinctive star-shaped tear pattern that indicates a pinch flat. Check the valve area too, leaks around the valve stem are common and often overlooked. If you find multiple punctures close together, the tube likely needs replacement rather than repeated patching.
Proper Patch Application Technique
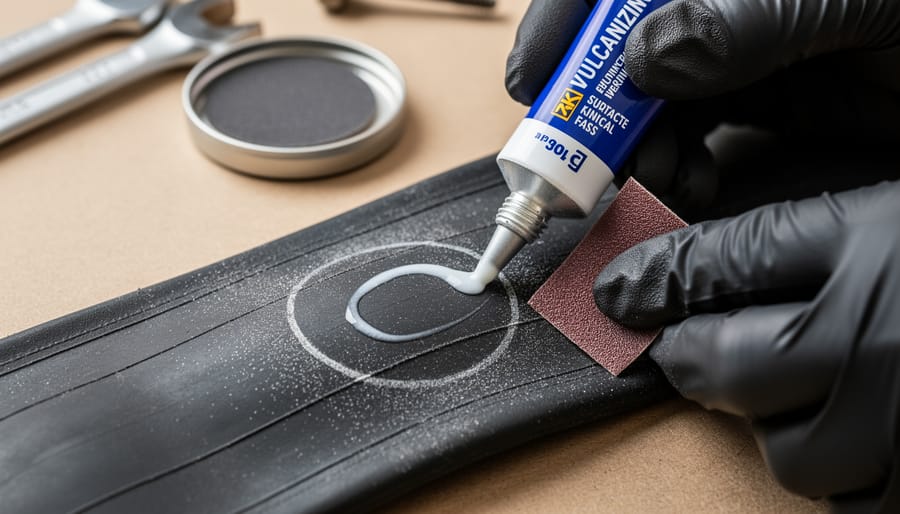
Proper surface preparation determines whether your patch holds for months or fails on the next ride. Start by roughing the puncture area with sandpaper or an abrasive pad from your patch kit, this creates texture for the adhesive to grip. Buff a slightly larger area than the patch itself, creating a circular zone about twice the patch diameter. Wipe away all rubber dust with a clean, dry cloth.
Apply a thin, even layer of rubber cement if your patch requires it (self-adhesive patches skip this step). The adhesive should cover the entire buffed area without pooling or gaps. Wait for the specified time, usually 3-5 minutes, until the adhesive becomes tacky but not wet. Touch it lightly; it should feel sticky but not transfer to your finger.
Peel the backing from the patch and position it directly over the puncture in one smooth motion. Pressing from the center outward, apply firm, sustained pressure for at least 30 seconds. Use your thumbs or a tire lever to really work the patch into the tube surface, ensuring no air bubbles remain at the edges.
Let the repair cure for the recommended time, typically 10-15 minutes minimum before inflation. Rushing this step causes 90% of patch failures.
Tubeless Tire Repair Methods
Tubeless tires offer excellent puncture resistance thanks to sealant, but when holes exceed what sealant can handle, you’ll need mechanical repairs. For punctures up to 6mm, plug repairs work remarkably well and can be performed trailside in minutes.
The plug repair process follows a specific sequence for reliable results:
- Locate the puncture by listening for air escaping or watching for sealant spray, then mark the spot with your finger or chalk.
- Ream the hole if necessary using the reamer tool from your plug kit, creating clean edges that will grip the plug material.
- Insert the plug with the installation tool by threading a rubber plug through the eye, coating it with extra sealant, then pushing it firmly through the puncture until only 3-5mm remains outside.
- Trim the excess plug material flush with the tire tread using sharp scissors or a blade, leaving just enough to prevent the plug from pulling through.
- Inflate the tire to recommended pressure and check that air isn’t escaping around the plug edges.
- Add 30-60ml of fresh sealant through the valve if the repair caused significant sealant loss or if you’re hearing minor air leaks around the plug.
For field repairs, bacon-style plugs and sticky rubber plugs are most popular. The bacon strips work without glue and seal immediately, while sticky plugs often provide more permanent fixes. Carry both in your repair kit along with a small bottle of sealant for topping off.
Larger holes (6-8mm) may require multiple overlapping plugs or a tire boot on the inside combined with plugs from outside. Damage beyond 8mm, sidewall cuts, or tears near the bead typically can’t be safely plugged. In these cases, your options are installing a tube to ride home or calling for support.
Back at the shop, you can reinforce field plug repairs from the inside using tubeless-specific patch kits that bond to the tire casing, providing a more permanent solution than plugs alone. This inside-out approach works well for holes that keep weeping sealant despite external plugs.
Tire Casing Repairs and Boot Installation
Small cuts in your tire’s casing don’t always mean you’re stranded. If the cut is less than 6mm long and doesn’t expose cords, you can install a tire boot, a reinforced patch placed inside the tire between the casing and tube, to get home safely. Purpose-made boots from Park Tool or other manufacturers work best, but experienced cyclists have successfully used folded dollar bills, energy bar wrappers, or pieces of old tire as emergency alternatives when caught without proper materials.
Start by locating the cut from inside the tire after removing the tube. Clean the area and position the boot so it extends at least 2cm beyond the damage in all directions. The boot prevents the tube from bulging through the cut, which would cause an immediate blowout. Smooth edges work better than rough tears, if the casing shows frayed cords or the cut exceeds 10mm, riding risks catastrophic failure even with a boot.
Sidewall cuts present higher risk than tread damage because sidewalls flex constantly during riding and bear substantial pressure without tread support. A booted sidewall might hold for a cautious ride home at reduced pressure (around 60-70% of normal), but don’t trust it for regular riding. Check the booted area frequently during your ride, if you see the tube bulging through or feel unusual tire behavior, stop immediately and reduce pressure further or consider alternative transport.
Verifying Your Repair and Testing for Leaks
After completing your repair, don’t rush to get back on the road. A thorough verification process is what separates temporary fixes from reliable repairs that’ll hold up over time.
Start by inflating the tube to your tire’s recommended pressure, which you’ll find printed on the tire sidewall. This initial inflation reveals whether your patch has bonded properly and can handle real-world riding conditions.
Complete verification checklist:
- Inflate to recommended pressure and listen for immediate hissing sounds
- Inspect the patch bond visually, checking for lifted edges or wrinkles
- Submerge the inflated tube in water and watch for telltale bubbles
- Let the tube sit for 30 minutes, then recheck pressure with your gauge
- Reinstall the tube and tire, then take a short safe test ride around your neighborhood
The water submersion test is your most reliable leak detector. Even pinhole leaks invisible to the eye will produce a steady stream of tiny bubbles. Pay extra attention to the patch edges, valve stem area, and anywhere you touched with tire levers during removal.
Monitor pressure over the next 24 hours. A slow leak might not show up immediately but will gradually reduce pressure overnight. If you notice any pressure loss exceeding normal permeation rates (about 1-2 PSI per day for standard tubes), you’ve got a problem that needs addressing before any serious rides.
Common Repair Mistakes and How to Avoid Them
Even experienced cyclists make preventable mistakes during tire repairs that can lead to failed patches, new damage, or unsafe riding conditions. Learning what these common errors are, and how to sidestep them, will help you avoid accidents and ensure your repairs actually hold.
The most frequent mistakes forum members and shop mechanics encounter include:
- Skipping surface preparation, trying to patch without properly roughening and cleaning the tube means adhesive won’t bond
- Rushing the adhesive cure time, inflating too soon causes patches to lift at the edges within days
- Using tire levers carelessly, pinching the new or patched tube during reinstallation creates fresh punctures
- Failing to remove debris, the thorn or glass shard that caused the original flat stays embedded and punctures again immediately
- Over-patching old tubes, adding a fourth or fifth patch to a tube compromises integrity and risks blowouts
- Ignoring alignment, poorly seated tire beads cause pinch flats on the first ride after repair
One community tip that prevents multiple mistakes: always run your fingers carefully around the inside of the tire casing before reinstalling the tube. This simple habit catches sharp objects you’d otherwise miss and takes only seconds. Another mechanic-recommended practice is waiting the full cure time printed on your patch kit, even when you’re eager to ride. Adhesive needs five to ten minutes depending on the product, and shortcuts here waste the entire repair effort.
The underlying pattern in most failed repairs is impatience. Taking an extra three minutes to prep surfaces correctly, check for debris thoroughly, and let adhesive set properly makes the difference between a repair lasting thousands of miles versus failing on your next ride.
Frequently Asked Questions About Tire Repair
How many times can you safely patch the same tube?
Most tubes can handle 3-4 well-placed patches before replacement becomes necessary. However, if patches overlap, sit near the valve stem, or cover more than 25% of the tube’s surface, it’s time for a new tube regardless of patch count.
Can you patch tubeless tires from the inside like regular tubes?
Yes, inside patches work for tubeless tires when plugs fail or for larger holes, but you’ll need tubeless-specific patch kits that bond with sealant. Clean the area thoroughly, let it dry completely, and reapply fresh sealant after patching.
Do self-adhesive patches work as well as traditional glue-on patches?
Self-adhesive patches offer convenience for roadside repairs but typically don’t last as long as properly applied glue-on patches. They’re excellent for getting home safely, though many cyclists prefer re-patching with traditional methods for permanent fixes.
How long should a properly done tube repair last?
A correctly applied patch using quality materials and proper technique can last the entire remaining life of the tube. The key factors are thorough surface preparation, adequate adhesive curing time (at least 10 minutes), and firm, even pressure during application.
When should you replace a tire or tube instead of repairing it?
Replace immediately if you find sidewall cuts, multiple punctures in the same area, worn tread exposing casing threads, or damage near the valve stem. Tubes older than five years should also be replaced even if they hold air, as rubber degrades over time.
Beyond these common questions, remember that knowing your repair limits helps you stay safe on the road. When you’re unsure whether a repair will hold for your planned ride distance or conditions, carry a spare tube as backup. Some repairs that seem adequate in your workshop might fail under load during aggressive cornering or rough terrain, so always test repairs on short, low-risk rides before committing to longer distances or challenging routes.
Key Takeaways for Successful Tire Repairs
The difference between a repair that lasts hundreds of miles and one that fails mid-ride comes down to following proven guidelines consistently. Never skip the initial safety evaluation. A sidewall tear or badly worn tire isn’t worth risking your safety, no matter how tempting a quick fix seems. When damage falls within repairable limits, commit to doing the job right rather than rushing.
Proper surface preparation matters more than most cyclists realize. Roughening the tube with sandpaper and removing all dirt creates the bond strength that keeps patches in place. Similarly, give adhesives their full curing time, even when you’re eager to get back on the road. Fifteen minutes of patience now prevents a frustrating roadside failure later.
Testing separates confident repairs from wishful thinking. Inflate to full pressure, submerge the tube if possible, and watch for bubbles. A test ride around the block reveals problems before you’re miles from home. Keep monitoring pressure over the first day or two to catch slow leaks early.
Finally, build your skills through practice rather than waiting for emergencies. Patch an old tube at home where mistakes don’t strand you. Ask experienced cyclists in your local community about their techniques. The mechanics who contribute tips in cycling forums have learned through thousands of repairs what works and what doesn’t. Their hard-won knowledge can save you from common mistakes and help you develop the confidence to handle most repairs yourself while knowing when to seek professional help.
Mastering tire and tube repair isn’t just about saving money on shop visits, it’s about self-reliance on the road and confidence in your ability to handle mechanical issues wherever they arise. The techniques covered in this guide form the foundation every cyclist needs, whether you’re commuting daily or tackling weekend adventures.
Practice these procedures at home before you face a roadside emergency. The first repair always takes longer, but with experience, you’ll work faster and spot potential problems earlier. Keep your repair kit stocked, inspect your tires regularly, and don’t hesitate to replace components when repairs won’t suffice.
We’d love to hear your repair experiences and tips in our community forums. What techniques work best for you? Have you discovered clever field fixes or learned lessons the hard way? Sharing knowledge helps every cyclist ride safer and more confidently in 2026 and beyond. Safe riding starts with properly maintained equipment, and now you have the skills to keep rolling.