How to Replace an 8 Inch Tire Tube in 7 Simple Steps
Replacing an 8 inch tire tube is a straightforward repair that most cyclists can complete in 15 to 20 minutes with basic tools. These small inner tubes power children’s bikes, balance bikes, scooters, and compact wheeled equipment, and while the repair follows the same fundamental principles you’d use to repair bike tires on full-sized bicycles, the compact diameter presents unique challenges that catch many first-timers off guard.
The smaller circumference means tighter clearances when working around the rim, less leverage when using tire levers, and a higher risk of pinching the new tube during installation. But here’s the good news: once you understand how to work within these constraints, you’ll find that 8 inch tubes are actually easier to handle than their larger counterparts. The reduced size means less material to wrestle with, and the entire wheel is light enough to manipulate comfortably on a workbench or kitchen table.
This guide walks you through the complete process, from gathering the right tools to verifying your repair holds air under pressure. Whether you’re fixing your child’s first bike or maintaining a folding commuter with small wheels, you’ll have the confidence to tackle this common repair yourself.
What You’ll Need: Tools and Materials for the Job
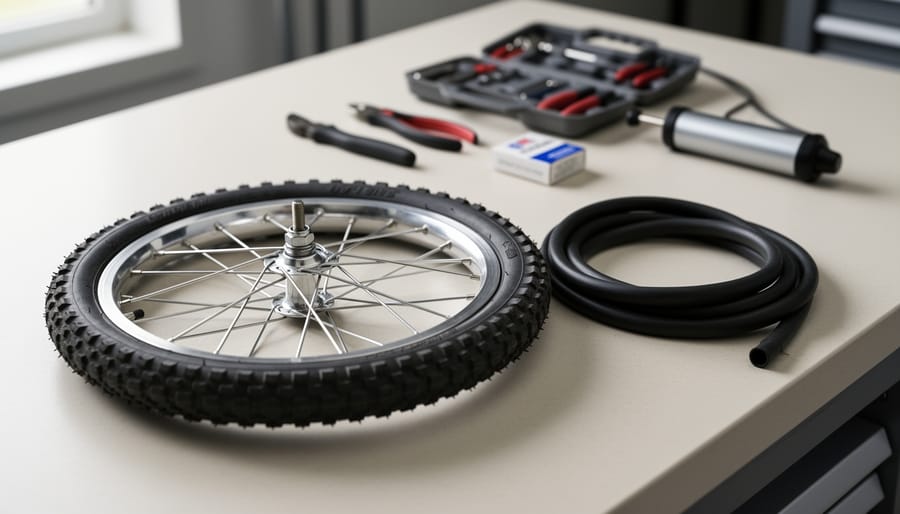
Before you start the repair, gather everything you’ll need. Having the right tools on hand makes the job faster and helps you avoid damaging the small tire or rim. Here’s what to collect:
- Tire levers (2-3): Plastic levers work best on 8 inch wheels to avoid pinching the tube or scratching the rim
- Replacement 8 inch tube: Must match your tire size exactly (check sidewall for markings like 8×1.25 or 8×2)
- Pump with valve adapter: Ensure it fits your valve type (Schrader or Presta)
- Patch kit (optional): Useful backup if you discover multiple punctures
- Talcum powder (optional): Reduces friction between tube and tire during installation
- Clean cloth: For wiping debris from inside the tire and rim
- Wrench or hex keys: Needed if your wheel uses bolt-on axles instead of quick release
The replacement tube is your most critical item. Eight inch tubes come in different widths, and using the wrong size can lead to blowouts or poor performance. Check your tire sidewall for the exact dimensions before purchasing. The valve type matters too, most kids’ bikes and small-wheeled equipment use Schrader valves (the same as car tires), but some balance bikes have Presta valves.
Tire levers specifically designed for bikes work better than screwdrivers or other improvised tools, which can tear the tube or gouge the rim. On small 8 inch wheels, you’re working in tight spaces, so having two or three levers gives you better control when unseating the tire bead.
Safety Checks and When to Stop
Before you start the repair, take a few moments to inspect everything carefully. Small 8 inch wheels might seem simple, but using the wrong tube size or missing damage can turn a quick fix into a dangerous failure.
First, check the tire sidewall for the exact size marking, it’ll read something like 8×1.25, 8×2, or 8×1½. Your replacement tube must match these numbers precisely. A tube that’s too large will fold and pinch inside the tire, causing an immediate flat. One that’s too small will stretch beyond its limit and can blow out under pressure, which is particularly dangerous on kids’ bikes where a sudden failure could cause a crash.
Inspect the rim thoroughly for dents, cracks, or sharp edges that could have caused the original puncture. Run your fingers gently along the inside edge of the rim and check that the rim tape (the strip covering the spoke holes) is properly centered and intact. Exposed spoke nipples will puncture your new tube within minutes.
Stop and seek professional help if you find structural damage to the wheel, bent spokes, a significantly warped rim, or cracks in the hub assembly. These issues go beyond basic tube replacement tips and require a mechanic’s assessment. The safety of the rider, especially if it’s a child’s bike, isn’t worth the risk of proceeding with damaged components.
Step-by-Step: Removing the Old 8 Inch Tube
Removing the Wheel
Start by turning the bike upside down or using a work stand if available. For most kids’ bikes with 8 inch wheels, you’ll find bolt-on axles rather than quick releases.
If your wheel has nuts on both sides, use a wrench (typically 10mm or 15mm) to loosen them. Turn counterclockwise on both sides, but you don’t need to remove the nuts completely, just loosen them enough to slide the wheel out. On bikes with rim brakes, you may need to release the brake cable tension first by squeezing the brake arms together and unhooking the cable.
For the rare quick-release setup, flip the lever open and unscrew the opposite side a few turns while holding the lever. The wheel should drop free.
Balance bikes often have simpler bolt systems with just one nut per side. Trailers might require loosening a mounting bracket before the wheel comes free.
Keep track of any washers or spacers as you remove them, they need to go back in the same order. Support the wheel as you pull it clear of the frame or fork, especially on small bikes where parts sit close together.
Getting the Tire Off and Tube Out
With the wheel off and the tube deflated, you’re ready to separate the tire from the rim. Start at a point opposite the valve, working here first gives you more leverage and keeps the valve from interfering. Insert a tire lever under the tire bead, hooking it against a spoke to hold it in place. The small diameter of an 8 inch wheel means you won’t need much force; aggressive prying can damage the rim or snap a plastic lever.
Slide a second lever along the rim about two to three inches from the first, lifting another section of bead over the edge. On these compact wheels, two levers are usually enough to free one entire side. Once you’ve popped that initial section over, run one lever around the circumference to unseat the rest of the bead. It should slide off smoothly now that the tension is broken.
Before pulling the tube out, note exactly where the valve sits. This helps you trace the puncture back to the corresponding spot on the tire during your inspection. Gently tug the valve stem back through the rim hole, don’t yank it, especially if it’s a Schrader valve with a threaded lock ring that might catch. With the valve free, reach in and pull the tube out completely, working around the tire until it’s entirely separated.
Keep the damaged tube nearby for now. You’ll want to inflate it slightly in the next step to locate the hole, then check that exact area on the tire’s inner surface for the culprit, a thorn, shard of glass, or wire strand, that caused the flat.
Inspecting and Preparing for the New Tube
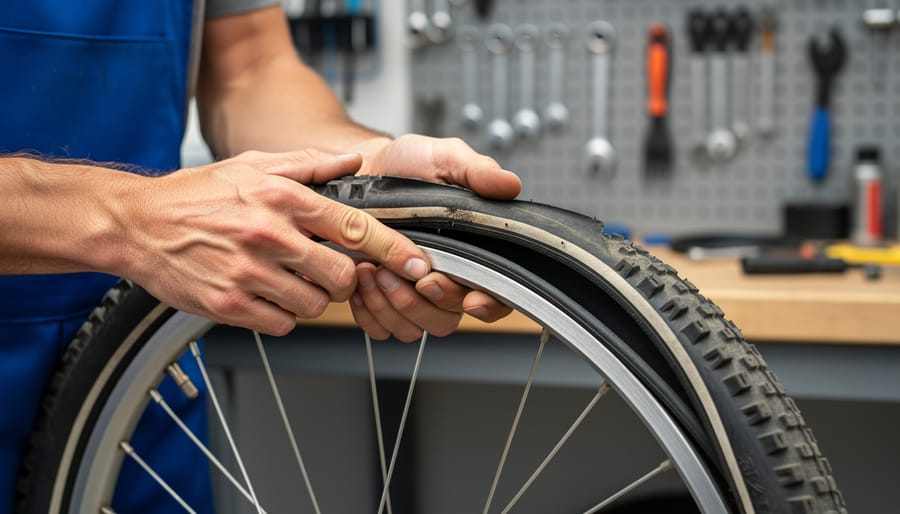
Before you install the new tube, take a few minutes to inspect everything carefully, skipping this step is the most common reason people get another flat within hours or days. Start by running your fingers slowly around the entire inside surface of the tire, feeling for any sharp objects like thorns, glass shards, or embedded wire. Work methodically from bead to bead, pressing gently against the inner rubber. If you’re worried about cutting your fingers, wrap a clean cloth around them or fold a rag and drag it around the inside instead.
Next, check tire damage on the outside by examining the tread and sidewalls closely. Look for cuts deeper than the surface rubber, bulges that indicate internal casing damage, or areas where the tire looks excessively worn or cracked. On small 8 inch tires, even minor sidewall cuts can become serious problems because there’s less rubber to begin with.
Don’t forget the rim tape, that thin strip covering the spoke holes inside the rim. Make sure it’s centered and covers every spoke hole completely. On 8 inch wheels, rim tape sometimes shifts or develops gaps, and exposed spoke holes will puncture your new tube instantly. If the tape looks torn, bunched up, or missing sections, replace it before installing the tube. A two-minute inspection now saves you from doing this job all over again tomorrow.
Installing Your New 8 Inch Tube
Seating the Tube Correctly
Before you tackle the final tire bead, get the tube positioned right, this is where most pinch flats happen during installation. Start by inflating the new tube just enough that it holds a round shape but stays flexible. You want it to have form without being firm; over-inflating now makes it harder to tuck inside the tire and increases pinch risk.
Thread the valve stem straight through the rim hole and push it in about half an inch. This keeps it from pulling sideways when you work the tire on. Now gently press the tube up into the tire cavity all the way around, making sure it sits evenly with no twists or folds. The tube should rest naturally against the inner tire surface, not bunched or stretched.
Check that the valve stands perpendicular to the rim, not angled. On 8 inch wheels, the tight curve means even a slightly crooked valve can cause the tube to sit unevenly. Give the wheel a slow spin and look for any visible tube peeking out between tire and rim, if you see rubber, tuck it back in before proceeding.
Getting the Tire Back On Without Pinching
The final stretch of tire bead is where most pinch flats happen during installation, so take your time here. With about 10-15cm of tire bead left to seat, you might feel tempted to grab the tire levers again. Don’t. At this stage, your hands are the safest tool.
Start by pushing down on the unseated section with both thumbs while working from the center of that section outward toward each side. The key is to use the heels of your palms to roll the bead up and over the rim edge rather than trying to force it straight on. On an 8 inch wheel, you have less leverage than on larger wheels, so proper hand position matters even more.
If the bead feels impossibly tight, check that the already-mounted sections aren’t sitting too deep in the rim’s center channel. Push the seated tire down into that channel all the way around the wheel, which creates slack and makes the final section easier to mount. You may need to do this two or three times as you work the last bit on.
Once the entire bead is seated, walk your fingers around both sidewalls, pushing the tire away from the rim to ensure the tube isn’t trapped between tire and rim. You should see the tube disappear completely under the tire bead at every point. This step will prevent pinches when you inflate.
Before adding air, give the valve a gentle push up into the tire, then pull it back down to center the tube around the valve area, a common pinch point on small wheels.
Inflation and Final Checks
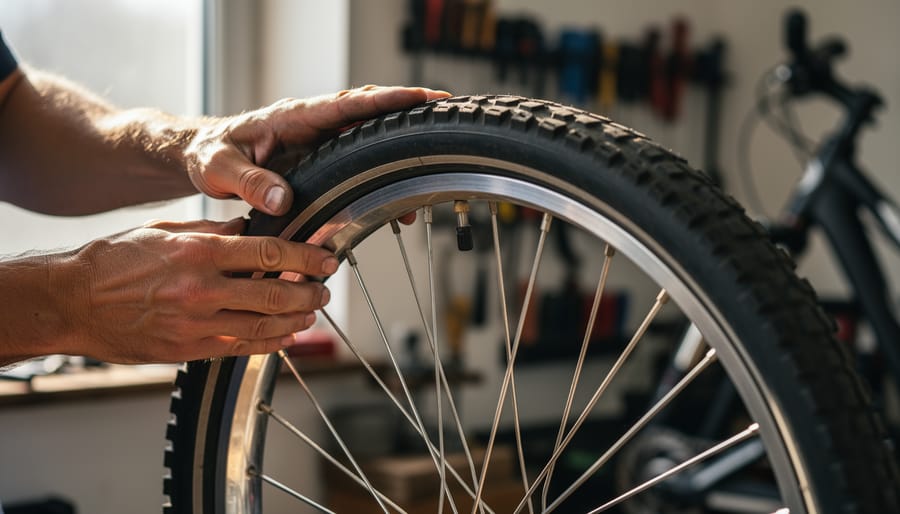
Check the tire sidewall for the recommended pressure range, usually stamped in PSI (pounds per square inch) or BAR. For 8 inch tubes, this typically falls between 20-40 PSI depending on the tire type, but always verify. Attach your pump to the valve, Schrader valves are common on kids’ bikes, and inflate slowly.
As you pump, watch both sidewalls. The tire bead should seat evenly into the rim channel all the way around. You’ll see a molded line on the sidewall that should run parallel to the rim edge. If you spot a bulge or dip, stop immediately, deflate slightly, and manipulate that section by hand to seat it properly. Uneven bead seating can lead to a blowout or make steering unpredictable, which matters especially on children’s bikes where bike safety tips are critical.
Continue inflating to the midpoint of the recommended range, if the tire says 20-40 PSI, aim for 30 PSI. This pressure works well for most casual riding and gives the tire a firm feel without being rock-hard.
Give the tire a firm squeeze with your thumb and fingers. It should resist but yield slightly. Spin the wheel and watch for wobbles or rubbing against the frame. Check the valve sits straight and hasn’t been pulled at an angle. If everything looks good and the tire holds pressure for a few minutes, your repair is complete and the bike is ready to ride.
Common Problems and Quick Fixes
Even with careful work, you might hit a snag during or right after installation. Here’s how to solve the most common problems without starting completely over.
If the tube goes flat within minutes of inflation, you’ve likely pinched it between the tire bead and the rim during installation. Deflate completely, push the tire bead toward the center of the rim on both sides to create slack, then re-inflate slowly while watching for the tube poking out anywhere. A pinch usually happens in the final few inches when mounting the second bead, next time, work more slowly through that last section and double-check before inflating.
A bulging section on the sidewall means the tube isn’t sitting properly inside the tire. Deflate to about 5 PSI, then massage and work the bulging area with your hands, pushing the tire bead toward the rim center to help the tube settle into position. Re-inflate gradually, stopping every few pumps to check that the bead line near the rim edge stays even all the way around.
Why won’t my tire bead seat properly on one side?
The rim tape may have shifted or bunched up, creating an uneven surface. Deflate, remove one bead, check that the tape lies flat and centered, then remount.
What if air hisses from around the valve base?
The valve nut might be loose, or the tube wasn’t positioned so the valve sits straight through the rim hole. Deflate, straighten the valve, ensure it’s perpendicular to the rim, and tighten the nut snugly.
How do I know if I’ve damaged the new tube during installation?
Listen for hissing and feel around the entire tube surface for escaping air. A fresh puncture usually means a tire lever scraped it or a sharp object remains inside the tire.
If you’re struggling to get that last section of bead over the rim edge, make sure you’re pushing the already-mounted portions of both beads down into the center channel of the rim as you work. This creates maximum slack. On stubborn 8 inch tires, working opposite the valve often gives you the most room. Warm tires are more pliable, so if you’re working in cold conditions, bringing the wheel indoors for a few minutes can make a surprising difference.
Replacing an 8 inch tube is one of those skills that pays for itself after the first successful repair. With basic tools and 15 minutes of your time, you’ll save money and keep small bikes rolling. Practice makes the process faster and builds confidence for roadside fixes. Always keep a spare tube and tire levers with you, they weigh next to nothing but prevent a walk home. Got questions or tips from your own repairs? Share them in our community forums and help fellow cyclists master this essential skill.